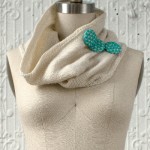
I’m working on a new design. A cowl with a nice folded hem edge… very neat and tidy… with a reverse stockinette turning row. Starting the project I like to think through all the details and this one had me a little stumped. I was thinking about how to make the BIND OFF end of the cowl match the neat and tidy folded hem of the cast on edge. Usually, designers just instruct you to knit the outside of the hem, work the turning row, then work the inside hem, bind it off, and stitch it down afterward, but since I’m a stickler and really wanted something that would stretch and move the same way the Cast-On Edge hem did, I decided to play around a bit. If you know how to do the Cast-On Edge Hem, skip down to the next header to see the Bind-Off edge version 🙂 Here’s what I came up with….
First, let’s do the Cast-On Edge Hem.
If you’ve never done it this way, I highly recommend you try it. It takes a bit more time to get started, but it leaves such a clean join that I think it’s worth the time.
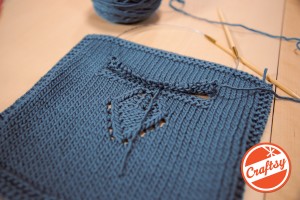
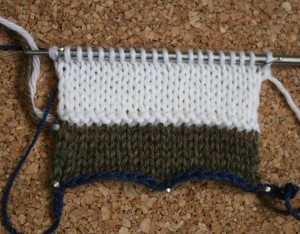 Here we have a provisional cast on (tutorial video here), the olivey green facing (done with a smaller needle. Normally I would have done one size smaller, but I couldn’t find my US 5, so I used a US 4), with the last row of the inside facing knit in the Main Color (white). If you skip this step and change colors right before you begin the turning row, then your turning row will have both the Facing Color and the Main Color on the purl bumps. Work the turning row with the smaller needle helps you keep a nice firm edge, but then change to the larger needle and knit an equal to slightly longer length of the Main Color knitted with the larger needle for the outside of the hem. Sometimes these hems have a tendency to flip up, but I find that if my outside length is just a slight bit longer, then the firm fabric on the inside tends to keep the curl in check a bit more. YMMV.
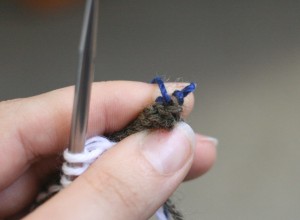
Now start undoing the provisional cast on. If you did a chain tail, once you undo all the chains you’ll get to this point. Move the olive green tail out of the way and you’ll see a loop of your Facing Yarn stuck between two segments of your provisional yarn (the blue yarn in my swatch). That loop of olive green is a live stitch.
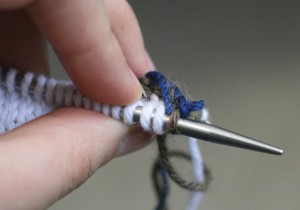 Slide your left hand needle (the one holding all your stitches into the Facing Yarn Loop. It should have the same orientation as all your other stitches (right leg in front, left leg in back).
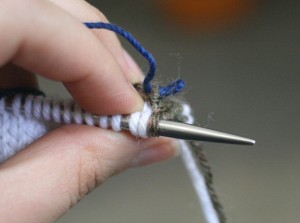 Then if you pull the waste yarn tail gently the chain will “unzip” and that stitch will now just sit on your needle.Knit together one Main Color stitch with one stitch from the provisional Cast-On. Now the next stitch from the provisional cast on should be stuck between segments of the waste yarn. Repeat the last 2 steps for all stitches across the provisional edge. If you didn’t increase during your swatch then you should have the same number of stitches in the provisional edge as you do in the live Main Color stitches. *Note:* The last stitch of the provisional cast on doesn’t really look the same as the rest, but if you pull both ends of your waste yarn up and away from the swatch, then that last stitch should lift up and present itself for you to knit it together with the last MC stitch.
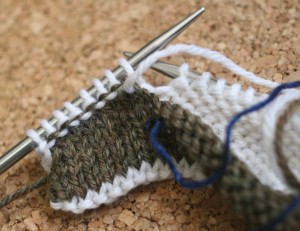 This is what your swatch should look like from the wrong side as you join the provisional and live edges. You can see that the knitted joining row makes a line of the main color appear on the contrast facing. It reminds me of top stitching on a sewn garment, and it’s one of my favorite parts of a hem like this.
Now, let’s do the Bind-Off Edge Hem.
So the problem is that a Cast-On Edge hem is worked with the knitted-together join at the very top because the live stitches from the outside hem are there, and the provisional stitches from the contrast facing can be folded up to meet them. Both ends have live stitches, which are worked together to form the join. But a Bind-Off edge hem will only have one live edge to join and nothing to join it to because you have to knit PAST the join point in order to knit both the outside and inside of the folded hem. So here’s my fix.
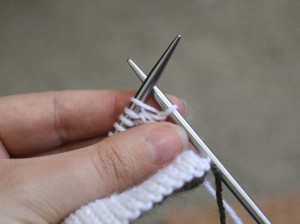 At the join point (If your folded hem is 1″ wide, then it would be 1″ before the desired length of the piece). You need to work a doubling row. To do this, knit into the front of the first stitch, leaving the original stitch on the left hand needle….
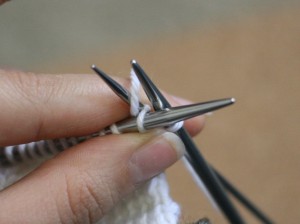
Then knit into the BACK of the first stitch using a much smaller and seperate needle. This can be a bit tricky. It feels a bit like a backwards three needle bind off. The key is to make sure that your working yarn is always UNDERNEATH the two needle points. So after you knit into the front leg of the stitch, bring the yarn down toward the swatch, bring your second needle in on top of the working yarn, and then knit into the back of the stitch.
 Repeat this all across the row. You should have the same number of stitches on the back needle as the front needle.
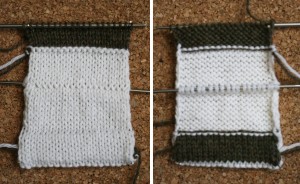
Then work a matching outside hem piece, change to the smaller needle and work the reverse stockinette turning row. Change yarns (since the stitches left on your needle after the turning row will become the matching edge of MC in the CC facing once you knit them with the contrast yarn) and one row short of a matching contrast hem. You need to stop one row short because we’re going to create the last row with a modified kitchener stitch in the next step. The front should look like the photo on the left, and the back should look like the right-hand photo, with the smaller needle still hanging out in the extra stitches on the doubling row.
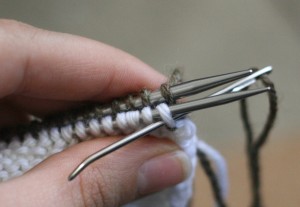
Now fold the end of the contrast hem toward the doubling row and break your contrast yarn with a tail about 3 times the length of the row. Thread the tail on a tapestry needle and work modified kitchener as follows: Go through the first stitch on the front needle as if to purl and slip it off the needle……
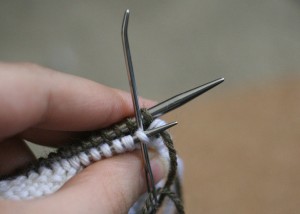 Thread through the next stitch on the front needle as if to knit, and leave it on.
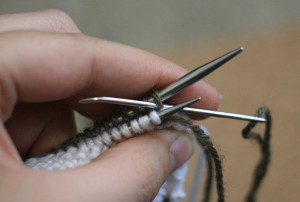
Thread through the first stitch on the BACK needle as if to purl and slip it off the needle, then thread through the next stitch on the back needle as if to knit, and leave it on. Both front and back needles will have the same “Purl, Off, Knit, On” treatment. This is what will give you the little line of MC purl ridges that looks so much like top stitching!
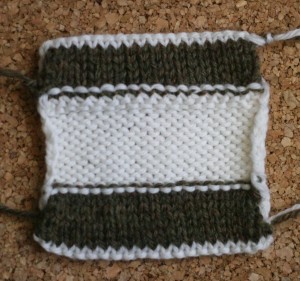 The Cast-On Edge Hem is at the bottom and the Bind-Off Edge hem is at the top. You can see that from the back there is a slightly different look to the doubling row.
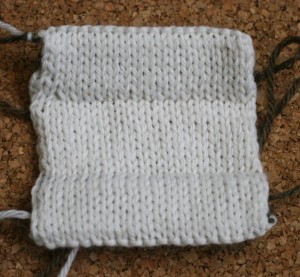 But from the front, the look the same (except for the place close to the left side on the top hem join where it looks like I accidentally worked two stitches together during the doubling row. Oops. 😀 Figured it out when I had extra stitches in the graft). But close enough 😉
Enjoy! Many happy facings to you!
M


