All things producing apace.

51-365 by mimsical
51-365, a photo by mimsical on Flickr.

The garden is producing (harvested some of my carrots last week), and I’m producing as well. The new collection is one piece from completion, and the styling tryouts have begun. Caro (Splityarn) is going to be in Salt Lake in early October for a sewing conference, and she’s agreed to take the photos for the new collection, so I’ll be modeling, with my newly svelt figure.

All said I’ve lost about 20 lbs since my last doctor appointment 6 months ago, and my doc declared me pre-diabetes free! Feeling quite healthy, which is certainly not hurt by the eating of all the garden goodness 🙂

Interview and a Contest with Kelbourne Woolens

RivelCardi4

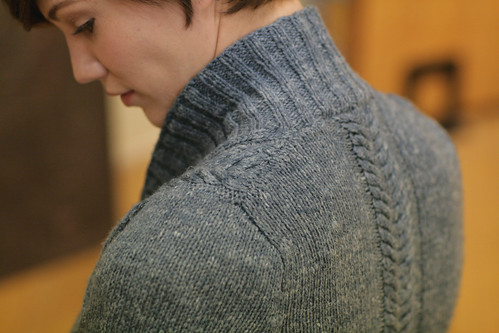
I had the lovely opportunity to work with The Fibre Company Savannah when I designed Rivel, and the lovely ladies of Kelbourne Woolens, Courtney and Kate, asked if I would be interested in doing an interview for their blog. They asked some really great questions about designing sweaters and working in collections. The interview is up along with a contest for a signed copy of Twist & Knit, a code to download the Chevron Collection and enough Savannah in your choice of color to knit the Rivel Cardi!

Go read the interview and leave a comment with what inspires your knitting and you could win!

M

p.s. if you haven’t read it yet, check out Courtney and Kate interviewing each other in the Fall issue of Interweave Knits. It’s freakin’ adorable 🙂

Tips for Long Cast Ons

Casting on should be fun and exciting and full of promise, but some times you have to cast on hundreds and hundreds of stitches, which can be a bit daunting. These tips are great, not only for lace, but for sweaters knit in the round, or anything that requires you to cast on a lot of stitches.
LCO1

Tip #1: Use Two Strands!

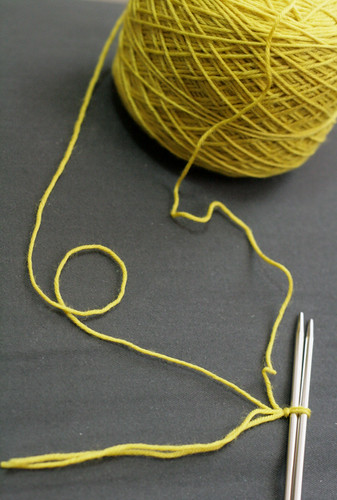
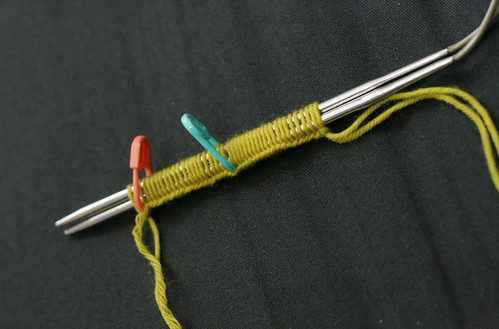
If you’re doing a long-tail cast on, instead of trying to figure out how long a tail you need for hundreds of stitches (and finding out 10 sts from the end of a 400 stitch cast on that you don’t have a long enough tail… ARGH!), use 2 continuous lengths of yarn! You can use both the inside and the outside ends of a center pull ball, or alternately 2 balls. Just hold the ends of both strands together, tie your slip knot in the doubled length of yarn, leaving enough of a doubled tail to weave back in, and cast on all your stitches. Don’t forget to count the doubled slip knot strand as only one stitch!

When you’ve got the right number of stitches, just cut one end of the yarn. I like to cut the strand coming from the inside of the ball because I prefer to use the strand from the outside of the ball with which to knit the piece. This will give you two extra ends to weave in, but that’s a minor inconvenience when you compare it to starting a piece with the wrong number of stitches.

Side Note: This can also be a cool effect if you use a contrasting color yarn for the thumb strand.
LCO2

Tip #2: Place Markers!

It really sucks when you get all the stitches cast on and then find that you miscounted and have to fudge a few stitches in somewhere. Avoid this, by placing markers at consistent points in the cast on. My favorite markers to use are those little plastic safety pins from Clover because you can just unclip them and take them out before you start working your first row, whereas if you used solid markers, you would have to wait until you reached that point in the knitting to remove the marker. Plus they come in 2 colors which comes in handy in the next paragraph. Also, they fit over needles held double, which is my favorite way to get a nice flexible and stretchy cast on that makes it really easy to work your first row.

Here’s how it works… Cast on 50 sts (or 25, or 20, or 10. Whatever breakdown works best for you and your attention span), place a marker. I chose the green ones to indicate 50. Double count the 50 sts just to be sure before you cast on any further. Cast on 50 more (100 sts total), then place another marker, preferably of a different color. Double count the second 50. Keep going like this, placing alternate color markers every 50 sts and double counting until you’ve got all the stitches you need. What I love about this tip is that you can see at a glance how far you’ve got. Three green markers and two orange ones = 250 sts.

Tip #3: Take A Break!

It can be a really long slog to cast on three or four hundred stitches. If you’re using markers like Tip #2 suggests, then you can set down the needles without fear of having to count your stitches all over again. Just make sure you place a marker, cast on one stitch after it to hold it on the needles and THEN set it down.

The wrist motion involved in a long-tail cast on is much more exaggerated than the motion made by the average knitter while knitting, so take breaks from a long cast-on more often than you would if you were just knitting. Maybe stretch your hands every 100 stitches. Or get up halfway through the cast on to get a drink of water. There’s no point in damaging your best tools (your hands) before you even begin the project!

Hope these tips make your life just a *little* bit easier 🙂

Best,
Miriam

Dreaming of Color

22-365 by mimsical
22-365, a photo by mimsical on Flickr.

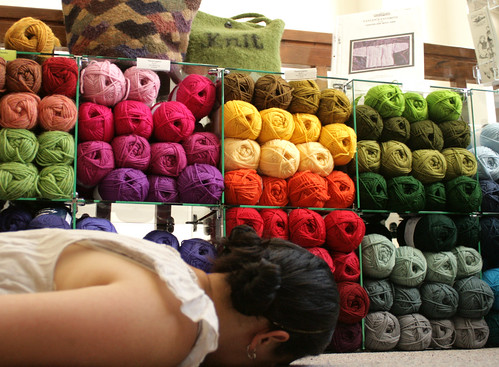
I’m working hard on the new collection, but I’m dreaming about the next projects to come. I want to make another Stripe Study (since my first one was lost in the Columbus Airport during my TNNA travel debacle. And I want to start some Christmas presents I have in mind (one a mitered square quilt-like afghan in worsted weight yarn). I’m ready to be moving on to the next thing, but have to finish the older stuff first.

But at least working part time at the yarn store I can fondle all the yarns and play in the colors.

M

Cherry Time!


19-365

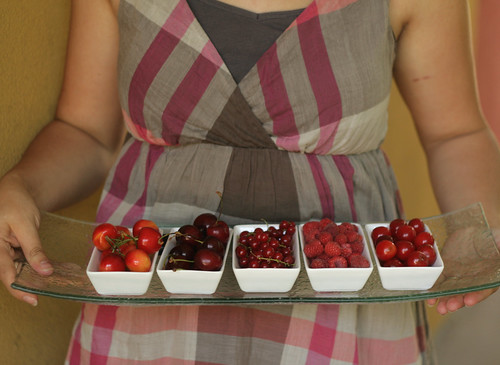
We’re deep into cherry season here in Salt Lake, and I’m thoroughly enjoying myself. In fact, lots of red fruits are in season. I’m planning to make myself a Cherry Slab Pie this weekend.


2

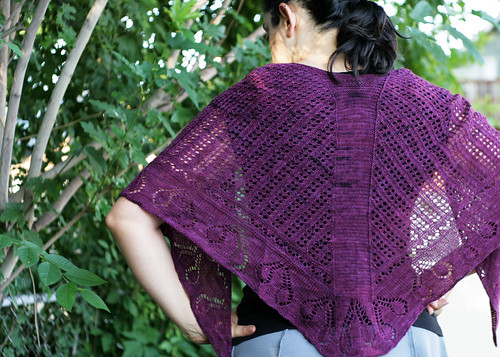
To celebrate Cherry Season, from now until the end of July, get 50% off the Summer Cherries Shawl! It uses about 900 yards of laceweight yarn, with a lovely Faroese shape. Worked from the bottom edge with the cherry border to the nape of the neck, once you get past the bottom border, it just FLIES off the needles. What a great project for summer travel knitting!

Either click the link above or just add the Summer Cherries Shawl to your Ravelry cart and the discount will be applied automatically.

Discovering My Neighborhood

17-365 by mimsical
17-365, a photo by mimsical on Flickr.

Thanks to the google maps app on my phone I realized there was a park just a couple blocks from my house (parks show in green on the map).

Yesterday I went to check it out. I’ve always seen it from the train side, which looks like a rectangular green valley with earthen hills built up around the field (boring!!), but the other side of the park has playground equipment and lots of great trees for shade and some benches.

When I needed a break from technology yesterday I took a walk to check it out and had a great time. The irony of using technology to find a getaway from technology is not lost on me.

I’ll definitely be back. Maybe even to work some days.

M

New Notebook!

15-365 by mimsical
15-365, a photo by mimsical on Flickr.

Is there anything quite so lovely as a new notebook?

I’ve talked about my struggles with writing in a notebook before (is anything I have to say really WORTH putting in a notebook?), but I’m glad to say I’ve got the hell over that drama and I’ve just finished filling my first moleskine. This is it’s replacement 🙂

M

Coming Back

I had reached that point where blogging was a chore I’d rather push to the bottom of the to-do list until it finally fell right off the page. I was trying to strike the right balance between being personable and personal while still being creatively interesting. And it just got boring for me.

With the arrival of twitter, facebook & pinterest my social time online got shifted to other venues…. ones with more interaction and a little broader focus. Venues where I didn’t feel the need to fill a whole page, just limit myself to 140 characters. It was easier.

So with my desire to revive this blog, I’m changing the format a bit. While I’ll still talk about my knitting and upcoming patterns, this space is going to be much more about my creative influence rather than just my creative output.

I’m working on the 365 Project (again), and so sometimes I’ll just post my self-portrait for the day or I’ll link you to something I love. Or maybe just a word I’ve been thinking about. Expect less involved (and possibly more cryptic) posts.

I hope you’ll come along and join me.

Mim

oh, and because that’s a lot of words to post without a photo, here’s one from my recent trip to Yellowstone National Park 🙂 You can see the whole set here.

yellowstone1

Rivel Cardigan

Purchase the pdf file now through Ravelry (you don’t have to be a Ravelry member to purchase)
| add to cart | show cart

RivelCardi2

With front and back pieces shaped to fit a woman’s figure, this high waisted feminine cardigan makes a great addition to any wardrobe. Knit it in a smooth wool for a more refined style, or a tweedy yarn for a more relaxed feel. The plaited cables wrap over the shoulders and the shoulder seams are moved to the back instead of on top of the shoulders.

RivelCardi3

Gauge: 22 stitches & 34 rows in 4 inches (10cm) square in stockinette stitch after blocking using larger needle.
Finished Measurements: Bust sizes 32 [36, 40, 44, 48, 52, 56] inches (81.5 [91.5, 101.5, 112, 122, 132, 142]cm). For specific measurements, see schematic
Yarn Requirements: 1025 [1150, 1275, 1400, 1550, 1675, 1800] yards of DK weight yarn.
Needle Size: 3.5mm (US 4) 24-36 inch circular for ribbing and bands, and 3.75mm (US 5) 24-30 inch circular needle for body or size needed to obtain gauge
Pattern Includes: charts and text translations of charts
Stitches Used: knit, purl, k2tog, yo, ssk, knit front & back, c3 over 3 right, c3 over 3 left, wrap & turn short rows, m1.
Other Details: This sweater is knit in pieces from the bottom up and seamed together. The front bands and collar are knitted on as one piece after the rest of the sweater is sewn together. This sweater is meant to be worn with 1-2 inches (2.5-5cm) of positive ease. The narrowest point of the sweater will hit a high waist. From the hem to the waist, all shaping is done on the back piece, while all shaping above the high waist is done on the fronts of the cardigan. This will give the sweater fullness where it’s needed (on the back near the hemline and on the front at the bust).

RivelCardi5

This pattern is part of the Chevron Collection. The whole collection can be purchased for $18.

Purchase the pdf file now through Ravelry (you don’t have to be a Ravelry member to purchase)
| add to cart | show cart

Rill Scarf

Purchase the pdf file now through Ravelry (you don’t have to be a Ravelry member to purchase)
| add to cart | show cart

RillScarf1

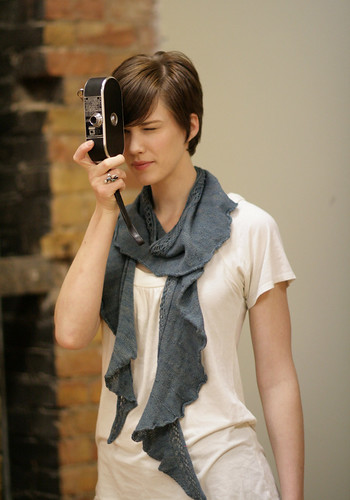
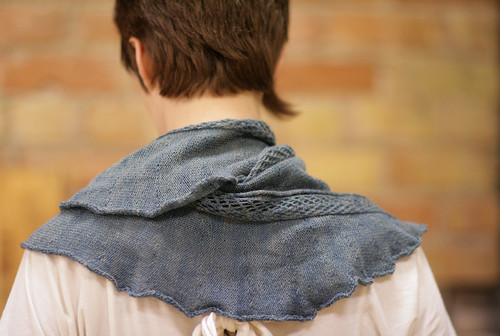
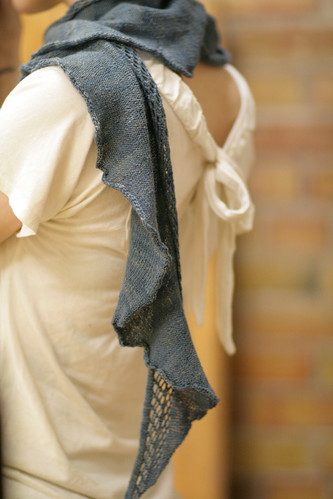
This flit of a scarf is the perfect accessory to add a little color or warmth to an outfit. This crescent shaped scarf is made using short row wedges to create an outside edge that is longer than the inside, lacy edge. This makes the scarf ruffle and the twirl along the hanging edges.

RillScarf4

Gauge: 32 stitches and 50 rows per 4 inch (10cm) square in stockinette after blocking
Finished Measurements: 84 inches (214cm) long, 7.5 inches (19cm) wide at widest point.
Yarn Requirements: 700 yards of laceweight yarn. Sample shown in Alisha Goes Around Glint (of Goldfish) Lace in colorway ‘Agave’
Needle Size: 2.5mm (US 1.5) straight or circular needle for flat knitting or size needed to obtain gauge.
Pattern Includes: charts and text translations of charts
Stitches Used: knit, purl, yo, k2tog, p2tog, purl front & back, ssk, sl1 k2tog psso, wrap & turn short rows.
Other Details: This scarf is worked flat from one point to the other with short row shaping to create the ruffles.

RillScarf6

This pattern is part of the Chevron Collection. The whole collection can be purchased for $18.

Purchase the pdf file now through Ravelry (you don’t have to be a Ravelry member to purchase)
| add to cart | show cart