I've titled this one "Internal Dialogue with Profanity"

M1: Do it, cut it! Hundreds of thousands of knitters have done this before. Don’t freak out!
M2: All those other knitters were CRAZY! This is CRAZY! Knitting should not be cut in half!
M1: This was your plan all along, so just stick with the plan
M2: What if I missed a step, what if something goes horribly wrong?*
M1: And if you don’t do it, you’ve got a sweater you won’t wear because it’s got a weird freaking placket in the front that was MEANT FOR THE STEEK! Just do it already.
M2: OMG! Here goes. *breathe* EEEK!
M1: You’re doing alright, just keep going…. Wait… what is that?!
M2: OMG OMG OMG! It’s starting to unravel! FUCK! What do I do? *hands begin to shake*
M1: Other knitters have said it started to unravel, but then stopped unravelling. Don’t FREAK OUT! Just calm down and finish it, there’s no going back.
M2: *pants* OH GOD! I think I’m going to screw up the most beautiful sweater I ever knit before it’s even done!
M1: Just keep going! You’re almost to the colorwork.
M2: Oh Shit.
M1: Oh Shit.
M2: I’m supposed to have 3 stitch on each side of the steek. There’s only 2 on this side, not 3.
M1: Uh… yeah.
M2: Crap. Is 2 enough for it to not unravel?
M1: No idea….
M2: ….. not helping….
M1: Well, just finish, you’ll make it work.
M2: I always do, don’t I. Maybe I should have started at the top…

I somehow got off on my first cut by one stitch too far left and ended up with 2 steek stitches on the left and 4 on the right. But the steek is cut and the facings are picked up.

I always thought the yarn harlot was exaggerating when she talked about having to have a little lie down after cutting a steek. Now I’m sure she was dead serious. My hands are still shaking and I feel like I’ve just run a mile chased by rabbid dogs. I think I need a cup of tea.

M

*I DID miss a step, I forgot to sew the steeks before cutting, which I know is not strictly necessary, but I realized it when I was about 2″ into the cut.

EPS Update

The yoke is done, the underarms are grafted and the sleeve hems have been sewn down. The ends are woven in and it’s time to steek the piece.

I’m a little bit nervous. No turning back after that. I want to make sure that I have time when I do sit down to do it so I can get the facings picked up as well. I think maybe tonight with some good lighting and an extra hand for photography will be just the trick.

M

Easy Peasy Pasta Salad

The thing I love most about summer and the warmer months is the fresh produce. During the summer I head to my local farmer’s market every weekend and return home laden down with fruits and vegetables that were just too beautiful to pass up. I sometimes buy more than I can carry and bought myself a bag-lady type cart to help with that.

We all have foods that define periods of time for us. A favorite Christmas cookie that brings to mind the smell of an evergreen and the sparkling lights or the tang of a fresh strawberry picked warm from the garden that reminds us of our childhood. For me, summer’s quintessential food is Pasta Salad. The way my mother makes it. Of course, after cooking for 7 children and 2 adults for lo those many years, she usually used larger proportions, but I cut it down for regular-sized-family consumption.

Pasta Salad ala Claudia

16 ounces (1 lb) of tri-colored rotelli pasta
1/2 large cucumber
1 green bell pepper
1 red bell pepper
1 small red onion (not in my mom’s version, but I love me some onion)
1/2 bottle of good Italian salad dressing*
A splash of balsamic vinegar (this is not strictly in my mother’s version either, but I <3 balsamic vinegar and put it in everything I possibly can. * don't skimp on the Italian dressing. If you get the really cheap kind (which is mostly oil) the pasta salad will be slimy. I like Kraft Zesty Italian myself. Boil water and cook the pasta according to the package directions, to an al dente texture. If you cook it too long, the pasta will fall apart in the salad. While the pasta is doing its thing, cut up your veggies into a 1/2" dice. You might want the onion a little smaller if it's a powerful one. When the pasta is done cooking, rinse it thoroughly with cold water to stop the cooking and cool the pasta. If you put the pasta into the veggies when it's still really hot, it will start to cook the veggies, which makes them loose their crispness. That is a BAD thing. Add the pasta to the veggies in a large bowl and coat with the salad dressing and add balsamic vinegar to taste, mixing well. Remember that it's much easier to add salad dressing to taste later than to overdo it in the beginning. Ask me how I know. And the dressing gets soaked in to the pasta as it sits, so you will probably need to add more if you are eating leftovers later. Keeps very well in the fridge and is just as good the second day, and the third, and the fourth if it lasts that long. It's fresh and tasty and so easy that you could make it for a last minute barbecue, or a potluck lunch. Also, it would be very easy to spice it up a bit by adding crumbled feta cheese, or a bit of grated parmasean. Or lightly steam some broccoli and add it to the mix. Or clean out your vegetable drawer and chuck whatever you've got in there. What are your tastes of summer? M

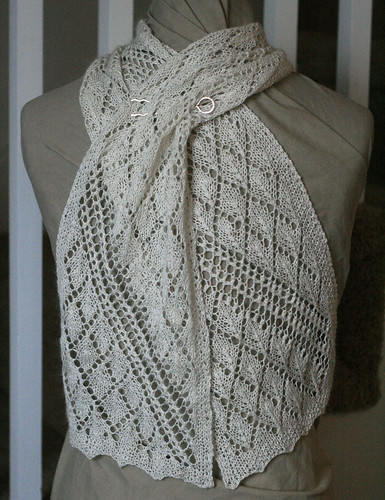
Pattern Release: Persephone Scarf

Now available in the store. And also available as a kit from Judy at the Ball and Skein shop.

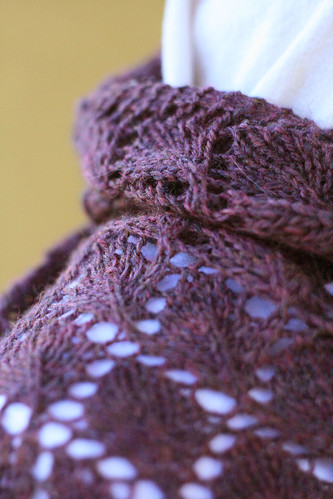
A perfect scarf for spring and summer. Light and airy, but just warm enough for those breezy spring and summer nights. Works up quickly in a fingering weight yarn. This pattern could easily be worked in a heavier yarn to make a cozier scarf.

Yarn Requirements: Ball and Skein Arbori (50% Merino, 50% Tencel), 1 skein (2 oz, and 350 yards) in colorway Purple Haze, or handspun like this version, 2 ounces at 21-23 wpi.
Needles: 3.5mm (US 4) needles for flat knitting.
Gauge: 47 sts (one chart wide) in pattern = 8″ after blocking.
Finished Size: 8″ wide by 50″ long.

Please visit the store to purchase an instant download.

M

EPS Continued

I finished the second sleeve on EPS, and joined the sleeves to the body. It was fiddley and uncomfortable to knit the first few rounds, but improved and after a few rounds I started the short rows. I worked 3 sets of short rows, using the center point of each sleeve as my reference.

The first set I worked 14 sts past the center sleeve point, the second 12 sts past and the 3rd (to sort of smooth them all out) at 20 sts past. I chose to do it this way (clustering the short row turns around the sleeve cap area) because I was concerned about the yoke pulling to tightly over my shoulders. I’ve worn yoked sweaters before and had a problem with that in the past, so by giving a bit of extra room to the shoulders by way of the extra fabric created in the short rows, I hope it solves this problem as well as creating more fabric on the back of the sweater so it doesn’t ride up.

I have tried a bunch of short row techniques, but had never tried the japanese way that Nona describes in her excellent tutorial. They worked perfectly, and if I didn’t know where to look, I wouldn’t be able to find the turns! I love learning new things!

When the short rows and a few more rounds were done, I got to start the colorwork (!!). I’d been thinking about this part as I worked on the stockinette body. I’d been waffling about whether to use EZ’s charts, or to make my own. And if I made my own, did I want a geometric pattern or something more pictorial…. and how would I handle the color changes…. clearly my mind has too much time on its hands 🙂

In the end, I just sat down with an excel spreadsheet set to be knitting graph paper and futzed with a zig zag pattern until I liked it. But this… THIS is the part I have been anticipating the whole sweater! I can’t put it down. I feel cheated when I have to stuff it in it’s bag and go to work. I want to sneak out and take knitting breaks like smokers take smoke breaks*. Not just because you’re tired of working, but because you NEED to go sate that desire.

I’m making up the rest as I go along. I’ve only got up to the first set of decreases charted, but it’s very intriguing watching the whole sweater reveal itself to me in this way. I’m so in love with it, I’m not sure I can take scissors to it when the knitting is done.

Don’t forget! Tomorrow is the release for the Persephone Scarf.

M

*this has long been a pet peeve of mine. Why is it that smokers get breaks specifically for smoking when knitters don’t get breaks specifically for knitting?

Cat Yodelling?

Watching this on Sunday morning, I laughed so hard that I woke C up.

M

Sweater Madness, Part 2

This is where we get deep into the madness part. And it’s a picture heavy brand of madness, so my apologies to those on Dial-up.

So I’m working on the EPS still, but I hear the siren song from the many piles of yarn stowed around my house. While sock yarn is singing and crooning to me, the skeins belting it out are the sweater yarns (they travel in packs rather than one skein here or two there, so it’s more like a choir).

The sweater that’s next in the queue is the Hourglass Sweater (ravelry link) in this beautiful chocolate brown Araucania Nature Wool. I plan to use the chocolatey brown for the sweater itself, and then the olive green there in the center for all the facings and turning rows. I want to make a sweater that is uniquely MINE. These are both colors I love and I think they’ll work out really nicely together.

I’ve also been thinking about this DK weight Zephyr. The color is luscious and I should have enough to do something good with…. but I might hold off and design something with it.

And the other one that’s caught my imagination is the 2 pound cone of wool/hemp that I bought a few years back. I have some plans to dye it, but dyeing is more of a summertime activity since it doesn’t have to heat up your house.

Too many sweaters, so little time. And that isn’t even the half of it. I posted all my sweaters worth of yarn in flickr after photographing it.

M

Sweater Madness, Part 1

My sock yarn stash may be growing (I can neither confirm nor deny reports of that nature), but right now I’m enamoured with sweaters!

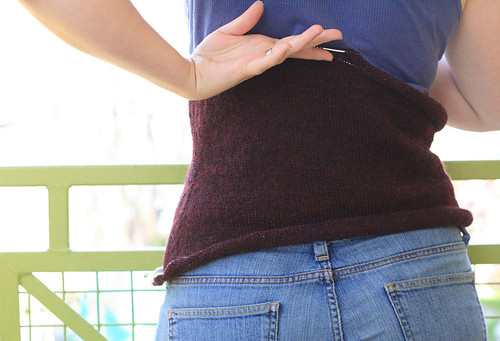
I finally did the math and began my EPS – Elizabeth (Zimmerman)’s Percentage Sweater. The basic idea behind this sweater is that you take your chest measurement (or bust measurement for the ladies) and multiply it by your stitches per inch, which gives you K, your key #. All other sweater measurements are based on this number. For instance, the sleeves begin with 25-35% of K for your cast on, and increase to 35-45% of K. I’m mostly following her numbers, although I did add waist shaping and while I used my bust measurement x spi as my K, I cast on more stitches than key because my hips are larger than my bust by a few inches and I didn’t want to constantly futz with pulling the sweater down around my hips.

The way I’m knitting the sweater right now, it has no ease either negative or positive. It just skims my hips and my waist and my bust. But after I steek it and add the bands, I’ll probably have .5-1″ of positive ease, which should be perfect for a cardigan to wear at work over my regular clothing, or throw on to go out and get the mail. I’m looking for an easy and beautiful sweater. There is nothing I hate more than gapping button bands, so I am avoiding negative ease like the plague. Since I don’t want it bunching or gapping, I also shunned ribbing in favor of a simple folded hem with a purled turning row on the body hem and at the cuffs. I’m still dithering about working the bands and collar with the same folded hem, or something else. I really would like the folded hem best to fit with the rest of the sweater, but after steeking it I might just want to be done.

That picture was taken on Sunday morning, so it’s a little old. I’ve now got the body knit up to the armpits, and one sleeve all but done. Just one more sleeve and I can start the yoke – I guess that means I should get to charting it….

I plan to add short rows, as EZ suggests, to keep the back of the sweater from riding higher than the front. But since I missed the one at the bottom of the back, I will go with a few sets of short rows before the yoke, and maybe some on the sleeves before I start the yoke so it doesn’t pull across my shoulders.

I have a deep abiding love for the yarn. It’s Reynold’s Whiskey, which I also used for the Foliage Shawl. The colors are lovely and for those of us who are self-proclaimed wool snobs, it’s WONDERFUL. It is squooshy, and heathered, and has the very rare bit of VM that ensures it’s not overly processed. My only bitch about the yarn is that it’s billed as a DK weight, which it most certainly is NOT. At 195 yards per 50 gram ball, it’s squarely in the fingering weight category (although on the heavier end) according to my favorite yarn reference. As a result, I got a good fabric on 3.25 mm (US 3) sized needles. The knitting is kind of slow going as a result, but I can see this as a sweater I will wear often and really enjoy.

I’ll keep you updated with milestones. And while writing this post I think I figured out how to do the button bands with a folded hem. Maybe a tutorial is in order…

M

And the occasional spinning

I love spinning. I just haven’t hardly had the time to sit down when I wasn’t already exhausted. I can’t spin when I’m exhausted, so I have been spinning only rarely.

But I’m working on this:

For my birthday last year, Margene gave me 2 big bumps of Spinderella‘s Thrums. I figured I’d better at least work on them before the next birthday rolled around, so I pre-drafted.

There are a lot of little nips of other fibers and some random threads in there, that make it sort of Zen spinning. You can’t get it perfect because the other little bits in the fiber will make it uneven no matter how hard you work at it, so you just have to accept that it will be lovely no matter what and keep spinning. It’s been very enjoyable and I think I may need to take some time this weekend and really dedicate myself to spinning this.

I’ve got 2 bobbins full and haven’t even finished one 5 ounce bump! I plan to make a 2 ply, but I’ll wait to see how the third bobbin comes out before I ply any 2 together. That way I can catch any inconsistencies and work them to my advantage.

M

Something pretty to look at; or, I hate taxes, thank God it's over for another year!

A good way to avoid doing your taxes is to have self-imposed knitting deadlines. Like this little wisp of a shawl. Knit in less than a week, with a heavier weight yarn, the whole thing was satisfying from start to finish and I never got bored.

Pattern: Foliage Shawl, my design, soon to be released in the store.
Yarn: less than 3 skeins of Reynolds Whiskey (100% wool, 195 yards per 50 gram skein), in color 086, which I believe they call Deep Raspberry.
Needles: 4.0 mm (US 6) 24″ circular
Finished Size: 56″ across the top, 28″ down the back.
Verdict: I wanted to do a simple shawl, easy to knit, with an easy to memorize body stitch, and a knitted on border with a similar motif and the leaves spoke to me. The whole project was wonderful. The fact that both body and border repeats were easy to memorize meant that I could knit it anywhere and not have to futz with a chart unless I got lost on where I was (which didn’t happen often). The yarn is a squooshy, lovely, heathered wool, which is not really a DK weight, no matter what the manufacturer says. For the body I used the same leaf motif as from Persephone, but without the diagonal lines to divide it up. I would call this a success.

I field a lot of questions about knitted on borders (like in Mountain Peaks and Zephyros). It’s just tricky to get your head around the fact that you’re knitting a border perpendicular to the body stitches, but attaching it as you go. I had planned to use this pattern as a demo piece for working a knitted-on border, so I think I will publish a tutorial to coincide with the pattern release. This could delay the release, depending on when I get the time to do the tutorial, but it’s not like I haven’t released anything recently 😉 There is no drought of pattern releases here!

M